by Vicki Boutin
Didn’t you just LOVE Vicki’s beautiful projects on pages 41-43 in the winter 2009 issue? Well we did too, and we knew our readers would like to recreate them. Here are the instructions for three of Vicki’s stunning holiday projects.

topiary tree
instructions:
- Paint a small clay pot with white acrylic paint.
- Punch six 2” circles from patterned paper and fold each circle in half. Attach the circles together to form a globe. Insert a lollipop stick through the center.
- Repeat step 2 with six 3” circles. Attach the two globes together.
- Add a piece of scalloped paper to the top of the pot and attach a holiday sticker to the front of the pot. Attach a ribbon.
- Add a piece of floral foam to the painted pot and push the lollipop stick into the foam to secure it in place.
- Paint and glitter a chipboard star, add a brad and attach to the top of the topiary. Cut thin strips of cardstock and fold them like an accordion. Add them to the pot.

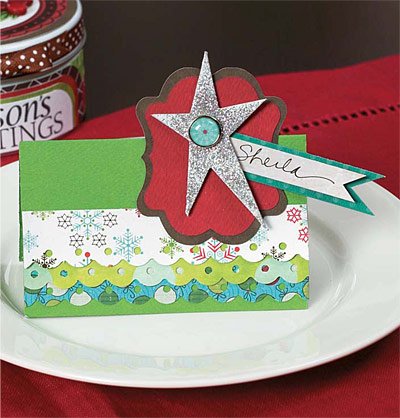
place card
instructions:
- Fold a 4” x 4” piece of cardstock in half.
- Using a border punch, create three 4” scalloped strips and attach them to the front of the place card.
- Paint a chipboard star with white paint and add silver glitter.
- Layer two scalloped frames together (I used two shapes that I cut with my Silhouette). Attach the chipboard star and name tag with a brad to the frames.

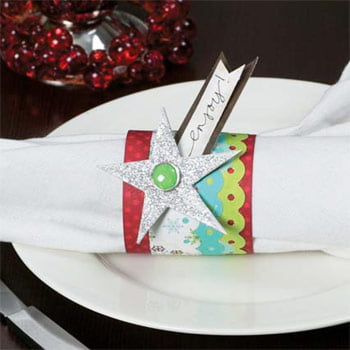
napkin ring
instructions:
- Cut a 6” x 2 ½” piece of patterned paper for the napkin ring.
- Using a border punch, create three 6” scalloped strips and layer them on the 6” piece of paper.
- Attach the 6” paper end to end to form a “ring”.
- Paint a chipboard star white and add silver glitter.
- Attach the star and nametag to the napkin ring with a brad.

